Develop a Smart Contract
Intro
Below is an example that use @artela/aspect-tool to deploy storage contract to Artela TestNet.
Pre-requisites:
1. Setting up a new project
Make sure you have a recent version of Node.js and npm installed,
Start by installing the aspect-tool:
npm install -g @artela/aspect-tool
Project Initialization, to kick off your project with aspect-tool, follow these steps:
# Create a new directory and navigate into it
mkdir storage-demo && cd storage-demo

# Set up the npm project with aspect-tool
aspect-tool init

# Install the necessary dependencies
npm install
This will create a project directory with the following structure:
.
├── README.md
├── asconfig.json
├── aspect                   <-- Your aspect code resides here
│   └── index.ts       <-- Entry functions for the aspect
├── contracts                <-- Place your smart contracts here
├── package.json
├── project.config.json
├── scripts                  <-- Utility scripts, including deploying, binding and etc.
│   ├── aspect-deploy.cjs
│   ├── bind.cjs
│   ├── contract-call.cjs
│   ├── contract-deploy.cjs
│   ├── contract-send.cjs
│   └── create-account.cjs
├── tests
└── tsconfig.json
2. Create a Smart Contract
Within the contracts directory of your project, create your smart contract source files with a .sol extension.
2.1.1. create a Storage.sol file
// SPDX-License-Identifier: GPL-3.0

pragma solidity >=0.8.2 <0.9.0;

/**
 * @title Storage
 * @dev Store & retrieve value in a variable
 * @custom:dev-run-script ./scripts/deploy_with_ethers.ts
 */
contract Storage {

    uint256 number;

    /**
     * @dev Store value in variable
     * @param num value to store
     */
    function store(uint256 num) public {
        number = num;
    }

    /**
     * @dev Return value
     * @return value of 'number'
     */
    function retrieve() public view returns (uint256){
        return number;
    }
}
3. Compile the Smart Contract
This step relies on solc, first check if solc is installed correctly
 npm install -g solc

 solc --version
Compile your contract using:
npm run contract:build
✅ Successful compilation will generate some
*.abifiles in thebuild/contractdirectory.
4. Deploy the Smart Contract
4.1 Update project.config.json
Update the project.config.json in the root directory with the appropriate network configuration:
{
  "node": "https://betanet-rpc1.artela.network"
}
For more details regarding development environment setup, please refer to artela devnet
4.2 Create a blockchain account (optional).
Execute the following command under the storage-demo folder to create an account if you haven't already done so:
// create  deployer

npm run account:create
- --skfile : privateKey path for sender. (optional, default value:
./privateKey.txt).
If your account lacks test tokens, join Discord,and request some in testnet-faucet channel.
4.3 Deploy your contract
Execute the following command within the storage-demo folder, using the provided script:
npm run contract:deploy -- --abi ./build/contract/Storage.abi \
                           --bytecode ./build/contract/Storage.bin
Upon successful deployment, the terminal will display the contract address.
5. Call Contract
Execute the following command within the storage-demo folder, call the Contract
5.1 Send transaction for store
npm run contract:send -- --contract {artToken-address} \
                         --abi ./build/contract/Storage.abi \
                         --method store \
                         --args 100
npm run contract:call -- --contract {artToken-address}  \
                         --abi ./build/contract/Storage.abi \
                         --method retrieve
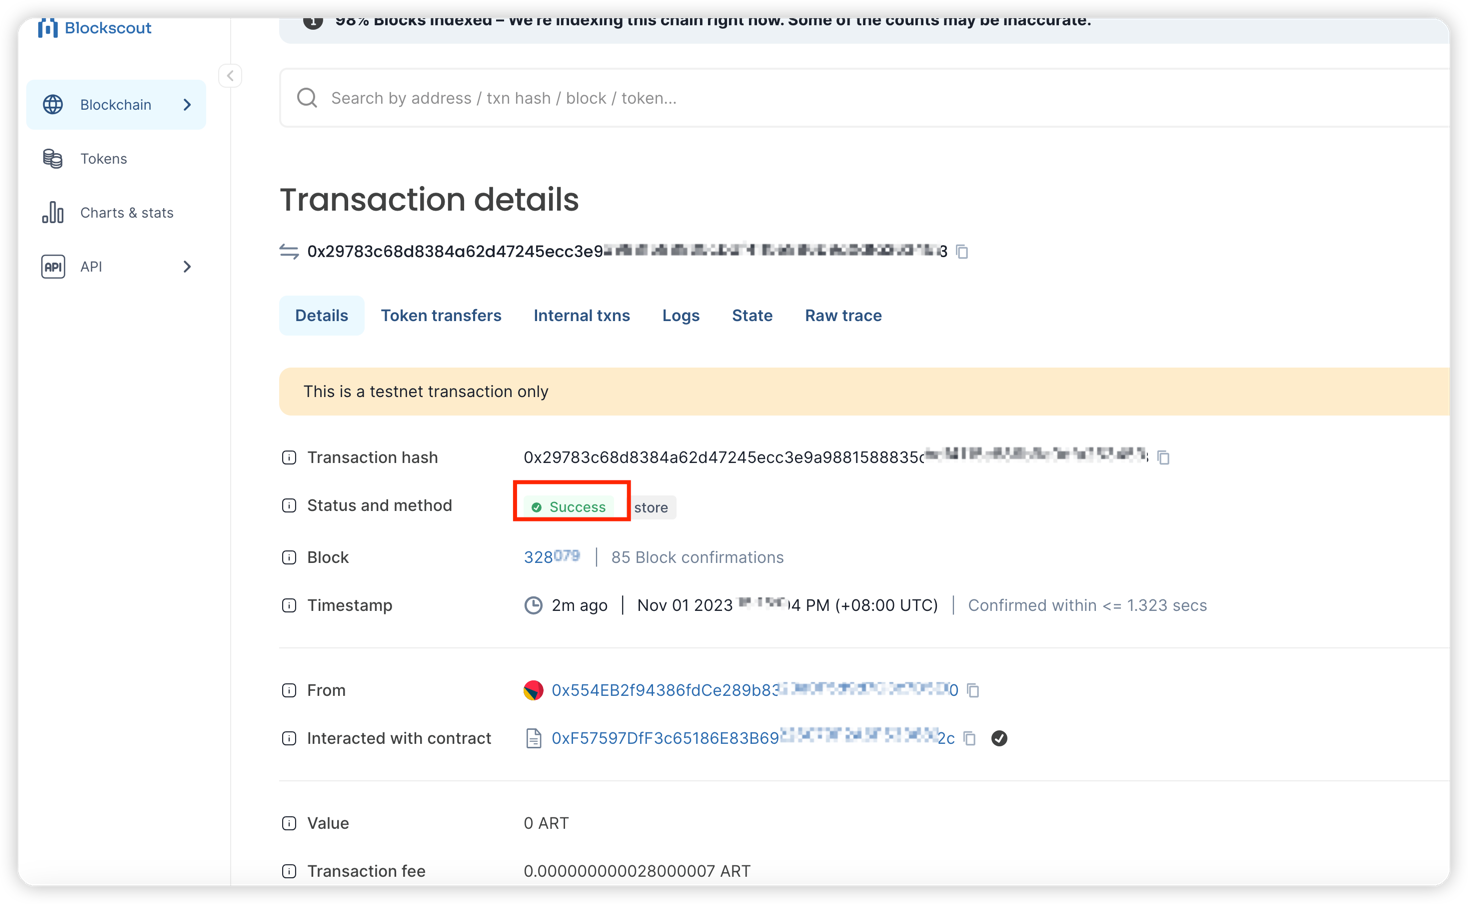
5.2 Check transaction
Confirm the successful on Artela TestNet blockchain explorer using transaction hash in output.