Develop with Remix
In this tutorial, we'll walk you through the process of creating and deploying a smart contract on Artela TestNet using Remix and MetaMask.
Pre-requisites
1. Write a Smart Contract in Remix
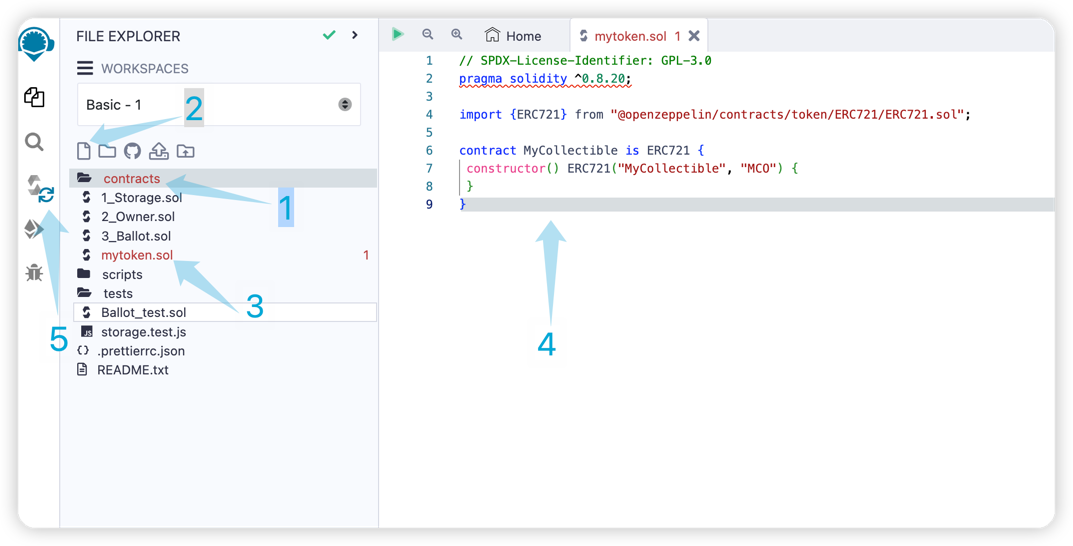
Launch Remix. Configure Remix for Solidity development by selecting SOLIDITY under Featured Plugins on the main page. Navigate to File Explorers to manage your files.
- Open "contracts" folder.
- Create new contract file.
- Enter the file name as "mytoken.sol".
- Copy the contract mytoken.sol code.
- Click "solidity compiler", and make sure the compilation is successful.
solidity compiler :

mytoken.sol :
// SPDX-License-Identifier: GPL-3.0
pragma solidity ^0.8.20;

import {ERC721} from "@openzeppelin/contracts/token/ERC721/ERC721.sol";

contract MyCollectible is ERC721 {
 constructor() ERC721("MyCollectible", "MCO") {
 }
}
2. Connect to Artela TestNet and Deploy
Connecting Remix to MetaMask and deploying your smart contract involves a few straightforward steps:
- Configure MetaMask for Artela TestNet:
- Open MetaMask and ensure that you are connected to the Artela TestNet. If Artela TestNet is not listed, you may need to add it manually. Navigate to the network settings and input the Artela TestNet details.
- Connect Remix to MetaMask
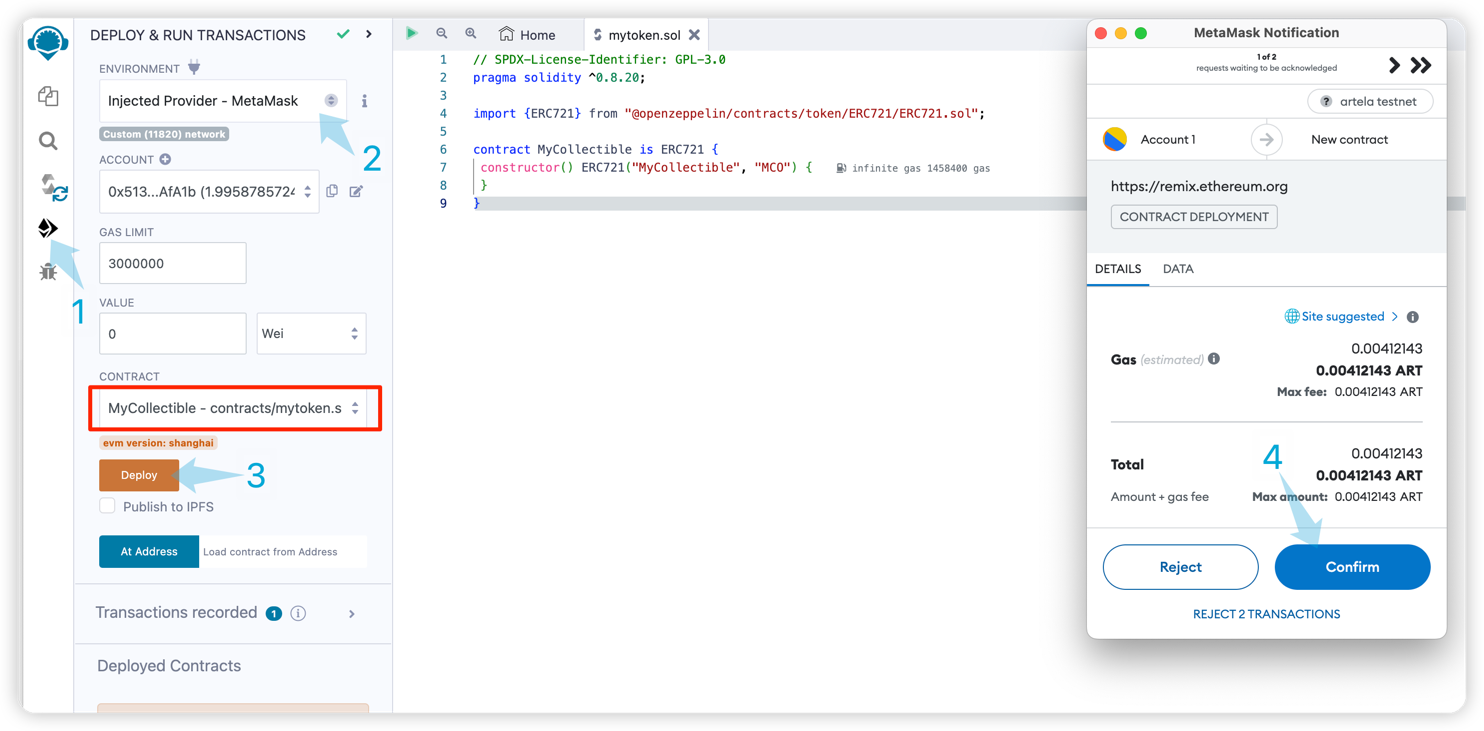
- At Remix, on the left side, Click the button
Deploy and run transactions. Set up the ENVIRONMENT isInjected Provider - MetaMask[2]
- At Remix, on the left side, Click the button
- Deploy Your Smart Contract
- With MetaMask connected, you can now deploy your smart contract from Remix.
- Compile your contract code and select the correct contract in Remix.
- Click on the
Deploy[3]button to initiate the deployment process.
- Confirm Transaction in MetaMask
- MetaMask will prompt you to
Confirm[4]the deployment transaction. - Review the details and confirm the transaction.
- MetaMask will prompt you to
3. Block Explorer
Confirm the successful deployment on Artela TestNet blockchain explorer using transaction hash in output.
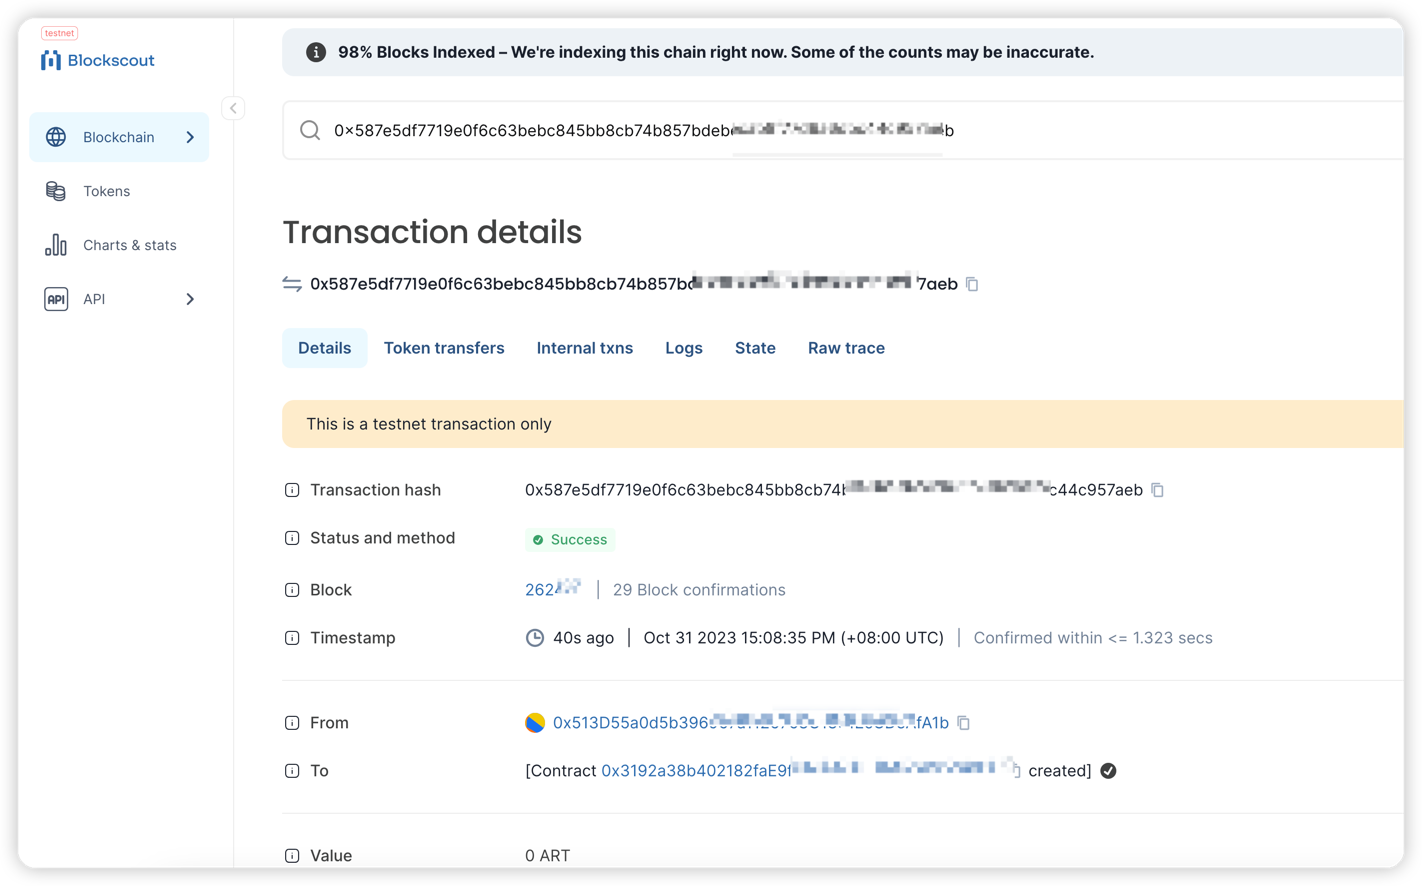
Congratulations! You've successfully created and deployed a smart contract on Artela TestNet. Happy coding!